
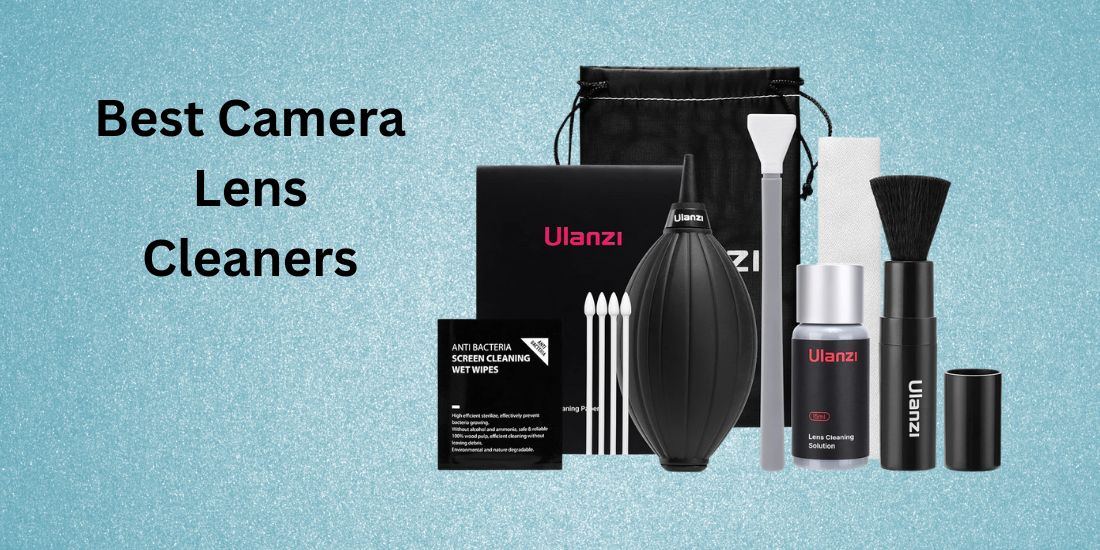
A camera lens is the heart of every photograph; it translates light into art, turning moments into memories. But even the most advanced lens can lose its magic if covered with dust, fingerprints, or smudges. Clean optics are essential for capturing sharp, detailed, and vibrant images. Whether you’re a professional photographer or an enthusiast, knowing how to care for your lenses is crucial. The right cleaning products and techniques not only enhance image clarity but also protect delicate coatings from damage. Nowadays, lens care tools have evolved, offering safer, more efficient, and travel-friendly options for every situation. From air blowers and brushes to wipes and microfiber cloths, each tool plays a vital role in keeping your lens crystal clear. This guide explores the best camera lens cleaners and shares expert tips on how to use, maintain, and store your lenses for lasting performance and pristine results.
What Makes Great Camera Lens Cleaners
Before diving into specific products, it helps to understand the criteria I used:
- Coating compatibility: Modern lenses often have multi-coatings, nano coatings, or water/oil repellent layers. The cleaner must not degrade or strip those.
- No residue, streak-free finish: Even invisible residue can affect contrast or flare.
- Safe for glass and plastics: Some lenses include external plastic parts, O-rings, etc.
- Ease of use, portability, and refillability: For field use.
- Dust removal first, then wiping: A good kit includes both a blower or brush and a wiping medium.
- Durability: Tools should last a while or have replaceable parts.
- Affordability & availability: Especially relevant for buyers outside major markets.
Using those criteria, let’s break down the best picks by category.
Top Camera Lens Cleaners
The Best Camera Lens Cleaning Wipes
Pre-moistened lens wipes are extremely convenient, especially for outdoor use or quick touchups. You simply open a sachet, unfold it, and wipe.
Zeiss Lens Cleaning Wipes:

Zeiss Lens Cleaning Wipes are high-quality, individually wrapped moist wipes designed for gentle and effective cleaning of eyeglasses, camera lenses, and other optical surfaces. They use a micro-fine fabric with a special cleaning formula that removes fingerprints, dust, smudges, and oils without scratching or leaving streaks. Safe for coated precision lenses, these wipes dry quickly and are convenient for on-the-go use. Users appreciate their portability and reliable cleaning performance, especially on high-quality glass and plastic lenses. However, it’s advised to use it only while moist and avoid contact with the eyes. They are also recommended for single use to maintain lens safety and hygiene.
Other strong contenders:
- Care Touch Lens Cleaning Wipes – a budget option, ammonia-free, and designed specifically for optics to avoid damage.
- Custom kits or bulk wipes from kit makers (e.g. within camera cleaning kits) often include such wipes.
- In user forums, many photographers carry a few Zeiss wipes as backups.
Advantages:
- Ultra portable, no need to carry liquid separately.
- Good for quick smudges or fingerprints.
Trade-offs:
- Once opened, they can dry out.
- Using them for heavy dirt or grit can risk micro-scratches if particles are not removed first.
Tips:
- Use a blower first to dislodge particles.
- Then apply the wipe in gentle outward strokes from the centre.
- Discard the wipe after use; don’t reuse.
The Best Camera Lens Cloth Cleaners
Cloths remain foundational; they’re reusable, gentle, and ideal when paired with a proper cleaning liquid.
Photographic Solutions PEC Pads:

Photographic Solutions PEC Pads are strong, non-abrasive, lint-free wipes made from 99.999% pure material, designed primarily for photographic applications. They are extremely soft and gentle, making it nearly impossible to scratch delicate surfaces like photographic emulsions, lenses, scanners, mirrors, and telescopes. Available in convenient sizes such as 4×4 inches for small areas and 9×9 inches for larger surfaces, these wipes clean effectively, especially when used with PEC-12 or Eclipse cleaning solutions. PEC Pads are versatile, safe for optical glass, and ideal for a wide range of sensitive cleaning tasks, but not recommended for cleaning camera image sensors.
Other good options:
- MagicFiber microfiber cloths (often bundled in kits)
- Microfiber cloths from camera accessory brands
- Ultra-fine lens cloths (1000+ GSM) that are safe for coatings
When paired with quality lens cleaning fluids (or even just a drop of optical-grade isopropyl + distilled water mix), a good cloth can gently remove oils and smudges.
Pros & cons:
- Reusable, cost-effective
- Gentle on coatings if clean
- Must be kept clean (wash properly)
- If cloth picks up a speck of grit, it can scratch.
The Best Camera Lens Cleaning Tool
By “tool,” I refer to things like carbon tip pens, stylus-type cleaners, or dual-ended cleaners that combine a brush + cleaning tip.
LensPen NLP-1:

The LensPen NLP-1 is an original, pen-shaped lens cleaning tool designed for maintaining camera lenses, binoculars, spotting scopes, telescopes, and other optical devices. It features a concave cleaning tip impregnated with a unique invisible carbon compound that efficiently removes fingerprints, smudges, and oily residues without the use of liquids. The tool includes a retractable brush for removing dust before cleaning. Known for its longevity, one LensPen can provide over 500 uses. It is safe for all lens coatings, easy to use, and designed to never dry out, making it a favoured choice for photographers and optics users.
Other possibilities:
- Similar carbon-tip pens from alternative brands
- Dual tips (brush + cleaning pad)
- Hybrid tools that include a blower + tip
Strengths and cautions:
- Great for removing oily fingerprints
- Compact and safe
- Not ideal for thick grime or grit
- Tip should be replaced periodically
Usage tip: Always blow off loose particles first, then use the pen tip gently in spiral motions from center outward.
The Best Air Blower
Blowers are fundamental because they let you remove dust without touching the optics.
Giottos Rocket Air Blower:

The Giottos Rocket Air Blower is a high-quality, hand-squeeze air blower designed for cleaning dust and debris from sensitive surfaces such as camera lenses, filters, keyboards, and other delicate equipment. Made from durable, environmentally-friendly silicone rubber, it provides a powerful, continuous burst of clean air without the use of chemicals. Its unique rocket-shaped design includes stable fins to stand upright and a removable nozzle for easy cleaning. The one-way valve prevents dust from being drawn back in, ensuring effective and safe cleaning for optical and electronic devices. It measures approximately 20 cm in length.
Other blower options:
- Squeezable rubber bulb blowers
- Blowers built into cleaning kits
- Electronic air/dust blowers (less common for optics due to risk)
Pros & cons:
- No contact, so minimal risk of scratching
- Effective for removing dry particles
- Not sufficient for sticky smudges
- Cheap blowers may weaken over time
Tip: Keep the tip of the blower clean with a dust cap. Avoid blowing directly from your mouth (moisture risk).
The Best Camera Lens Cleaner for Travel
When you’re on the move, you want something compact, leak-proof, and reliable.
Alpine Innovations Spudz Classic:
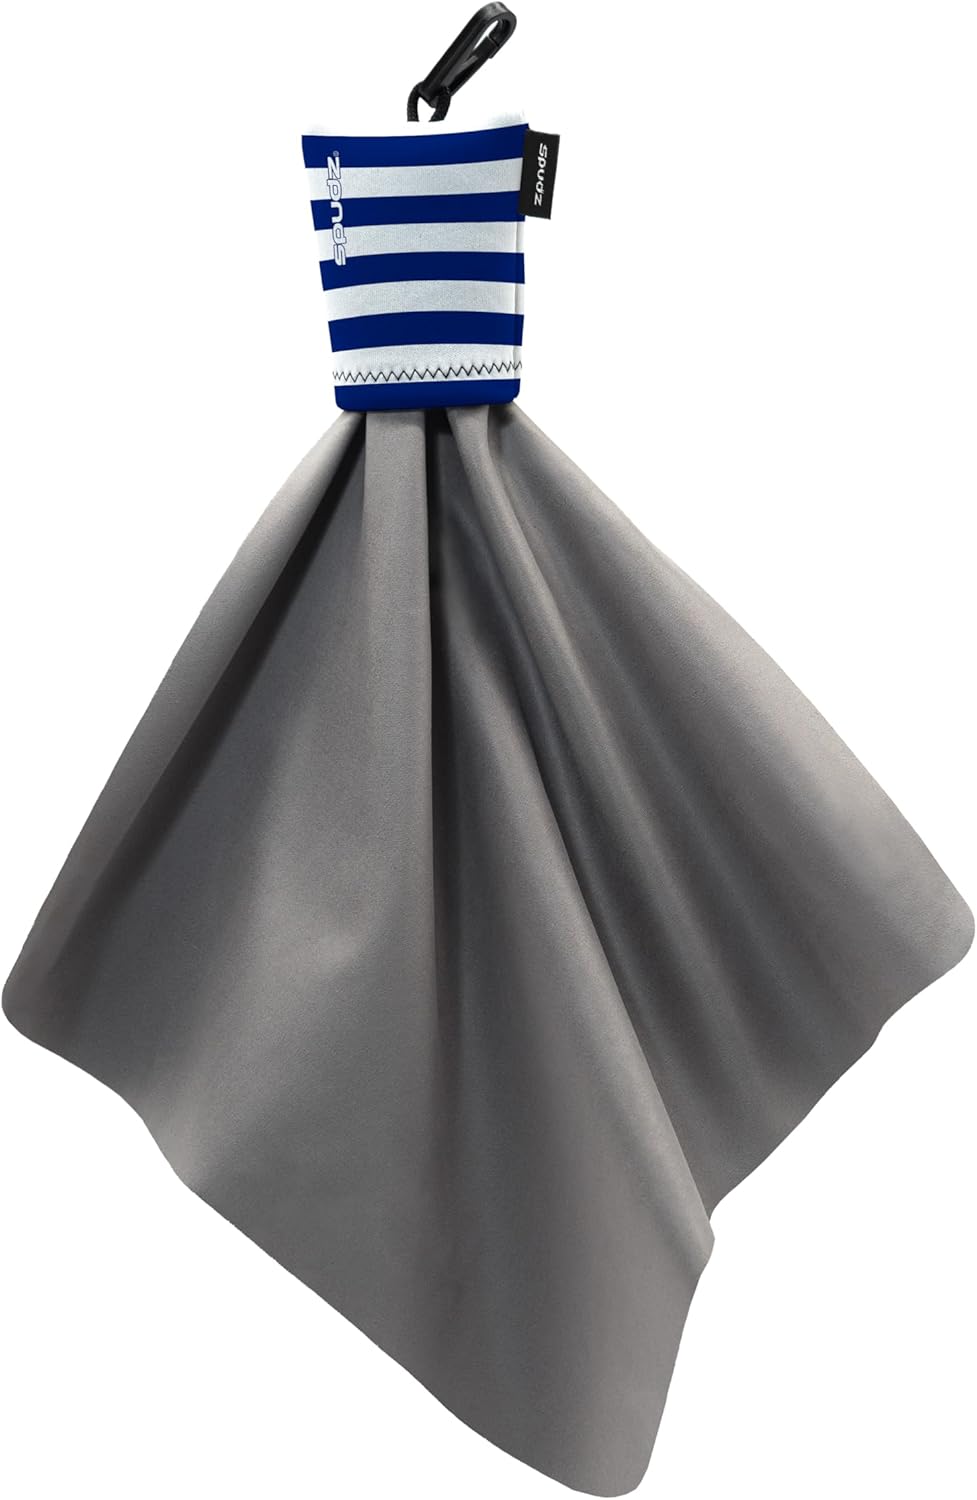
The Alpine Innovations Spudz Classic is a premium microfiber lens cleaning cloth designed for safe, streak-free cleaning of all optics and screens. Its patented design features a microfiber cloth attached to a durable neoprene pouch with a clip, enabling easy attachment to bags, jackets, or keychains, ensuring the cloth is always accessible. The cloth effectively removes smudges without scratching delicate lenses and is machine washable for repeated use. Compact and lightweight, the Spudz Classic is ideal for photographers, eyeglass wearers, and anyone needing quick, reliable lens cleaning on the go.
What to look for in a travel cleaner:
- No liquid leaks
- Sealed wipes or cloth compartments
- Compact form factor
- Multi-function (e.g. cloth + pouch + attachment)
Travel tip: On flights, avoid extreme temperature changes (liquids can expand). Use wipes or dry tools when possible at altitude.
Best Anti-Static Brush
Anti-static brushes help gently lift dust by neutralising static charges, beneficial for filters, viewfinders, or sensitive optical surfaces.
Kinetronics StaticWisk:

The Kinetronics StaticWisk is a handheld anti-static brush designed for cleaning camera lenses, films, scanners, plastics, acrylics, glass, jewellery, monitors, and other delicate equipment. Its unique blend of soft natural hairs and conductive synthetic fibres effectively dissipates static electricity, helping to whisk away dust and lint without scratching surfaces. Available in multiple sizes from ¾ inch (20mm) to 11 inches (280mm), the StaticWisk brush is valued for its gentle yet thorough cleaning capabilities. It has a conductive construction that prevents static build-up, making it ideal for sensitive optical and electronic gear maintenance.
Other acceptable brushes:
- Natural goat-hair lens brushes
- Specialty anti-static brushes in cleaning kits
- Soft camel-hair brushes designated for optics
Strengths & cautions:
- Helps remove dust that resists blowing
- Gentle on coatings
- Use light strokes only
- Don’t scrub; use delicate sweeping.
Best camera lens cleaning spray
Zeiss Lens Cleaning Spray:

Zeiss Lens Cleaning Spray is a professional-grade cleaner developed by Carl Zeiss, a renowned name in optics. It’s specially formulated to clean delicate camera lenses, filters, and optical glass without leaving streaks or damaging coatings. The spray’s gentle, alcohol- and ammonia-free composition effectively removes fingerprints, oil, and dust, restoring your lens’s clarity and sharpness. It’s safe for all lens types, including multi-coated and nano-coated surfaces, making it a reliable choice for photographers who demand precision and care in their equipment maintenance.
Pros:
- Gentle and Safe Formula: Non-abrasive, alcohol-free solution that protects delicate coatings while delivering a thorough clean.
- Streak-Free Finish: Leaves lenses spotless and clear, ensuring optimal image quality and performance.
Cons:
- Requires a Microfiber Cloth: Works best when used with a high-quality cloth, adding an extra step to the cleaning process.
- Not Ideal for Field Use: The bottle isn’t as travel-friendly as wipes or pens, making it less convenient for on-the-go cleaning.
Best Specialist Camera Lens Cleaners
Specialist cleaners are used for deeper cleaning: oily residues, fungus, water spots, or exotic lens coatings.
1: Urth Lens Cleaning Spray V2:

Urth Lens Cleaning Spray V2 is a plant-based, non-abrasive cleaning fluid designed for camera lenses, lens filters, and nano-coated optical glass. It avoids harsh chemicals like alcohol and ammonia, making it gentle yet effective. The spray comes in a 20ml recyclable ABS plastic bottle with a twist-top nozzle, dispensing about 100 cleans per bottle. Unlike the V1 version, the V2 bottle is not refillable and has a more secure lid that prevents accidental spillage. This spray is ideal for safely removing dust, fingerprints, and water spots from delicate lens surfaces and tech screens, supporting eco-friendly cleaning practices.
2: Eclipse Optic Cleaning Solution:

Eclipse Optic Cleaning Solution by Photographic Solutions are high-purity camera lens cleaners designed for digital sensors, lenses, and filters. It contains a fast-drying formula that leaves no residue, making it the preferred choice for cleaning CCD and CMOS sensors when used with Sensor Swab Ultra. The solution is also safe for critical optics when paired with PEC*PAD non-abrasive wipes, allowing precise cleaning that eliminates streaks and hazy swirls. However, its pure methanol content means aggressive or prolonged use can remove lens coatings. It is available in a 2 oz (59 ml) bottle with a dropper applicator for controlled application.
When to use a specialist cleaner:
- Oily smears that resist normal wipes
- Water spots or mineral residue
- Fungus or microbial film
- Before long-term storage to prevent damage
Caution: Always apply cleaner to a cloth or tissue first, not directly onto the lens. Use minimal fluid. Use a clean, lint-free cloth afterwards.
How to Use Camera Lens Cleaners Safely
Cleaning a camera lens might seem simple, just wipe and go, right? Not quite. Modern camera lenses have delicate coatings designed to reduce reflections and improve sharpness, and one careless move can damage them permanently. To keep your lenses crystal clear without risk, here’s a detailed, professional, and easy-to-follow guide on how to use camera lens cleaners safely.
Step 1: Prepare Your Workspace
Before touching your lens, create a clean and stable environment.
- Choose a dust-free area. Avoid cleaning lenses outdoors or in windy places, as airborne particles can immediately land on the glass while you clean.
- Use proper lighting. A desk lamp or daylight near a window works best. The goal is to see smudges, fingerprints, or dust clearly.
- Wash your hands. Natural oils or dirt from your fingers can easily transfer to the lens or the cleaning cloth.
- Gather your tools.
- Air blower
- Anti-static brush
- Lens cleaning cloth or wipes
- Lens cleaning fluid (if required)
- Lens pen (optional)
Keep everything within easy reach so you’re not scrambling mid-clean.
Step 2: Inspect the Lens Surface
Hold the lens under a bright light at an angle and check for:
- Dust or lint
- Fingerprints or oily spots
- Dried watermarks or smudges
This initial inspection helps you decide which cleaning steps are necessary. Never jump straight to wiping; you must first remove loose particles to prevent scratches.
Step 3: Start with the Air Blower
Why: This is the safest, no-contact way to remove dry dust and particles.
- Hold the lens upside down so that dust can fall off rather than settle back.
- Use a Giottos Rocket Air Blower or similar rubber bulb blower.
- Give several gentle bursts of air toward the glass surface, keeping the nozzle a few centimetres away.
Do not:
- Blow using your mouth (moisture and saliva can cause spots).
- Touch the lens with the blower’s tip.
- Use compressed air cans, they can release propellants that damage coatings.
This step alone removes most surface particles safely.
Step 4: Use an Anti-Static Brush (Optional but Recommended)
If dust remains after blowing, use a soft anti-static brush (like Kinetronics StaticWisk).
- Hold the lens steady.
- Gently brush from the centre outward in a circular motion.
- Do not press down, let the bristles do the work.
The anti-static properties prevent dust from clinging back due to static charge.
Step 5: Spot Cleaning with a Lens Pen (for Fingerprints and Oil)
A LensPen or similar carbon-tip cleaning tool is ideal for small, oily spots.
- Extend the pen tip and gently touch it to the lens surface.
- Move it in light, circular motions starting from the centre and spiralling outward.
- Do not apply excessive pressure or scrub, a few gentle swipes are enough.
- When done, recap the pen to protect the carbon pad from contamination.
The carbon compound on the LensPen absorbs oils without using any liquid, which minimises risk.
Step 6: Use Lens Cleaning Wipes or Cloth with Cleaning Fluid
If the lens still shows smudges or streaks, use a microfiber cloth or pre-moistened lens wipe.
For wipes (e.g., Zeiss Lens Wipes):
- Open a single pack right before use to avoid drying out.
- Gently unfold the wipe and clean in circular motions from centre to edge.
- Don’t reuse the same wipe, discard after one session.
For microfiber cloths:
- Add one or two drops of lens cleaning fluid (like Eclipse or Urth) to the cloth, never directly onto the lens.
- Wipe gently in outward spirals.
- Use a dry part of the cloth for a second pass to remove any moisture or streaks.
Important:
- Avoid paper tissues or rough fabrics; they can scratch coatings.
- Don’t overuse liquid; too much can seep into the lens edges and cause damage.
Step 7: Dry and Inspect Again
After wiping, check the lens under bright light again. If you see faint streaks, lightly buff with a clean, dry section of the microfiber cloth.
If residue remains:
- Repeat the process, using fresh materials.
- For stubborn spots, a specialist cleaner may be needed, but use it sparingly.
Always end your cleaning session with a spotless, streak-free lens.
Step 8: Protect the Lens After Cleaning
- Replace the front and rear caps immediately after cleaning to keep dust out.
- Store your lens in a dry, clean, and padded bag.
- Consider using silica gel packs to control humidity if you live in a damp area.
Regular cleaning helps, but over-cleaning can cause micro-scratches or wear down coatings. Only clean when truly necessary; prevention is better than constant maintenance.
Essential Safety Tips and Mistakes to Avoid:
- Never use household cleaners for camera lens (like window sprays, vinegar, or alcohol mixtures not meant for optics). They can ruin lens coatings.
- Do not spray directly on the lens — always apply cleaner to the cloth first.
- Avoid circular rubbing with pressure — gentle, straight motions are safer for stubborn marks.
- Keep all cleaning tools sealed and clean. A dirty cloth can cause more harm than good.
- Handle lenses by the barrel, not by the glass, to avoid fingerprints.
- Do not mix cleaning products — combining chemicals can cause streaks or residue.
A Quick Summary of the Safe Cleaning Process:
| Step | Tool | Purpose |
|---|---|---|
| 1 | Air blower | Remove loose dust safely |
| 2 | Anti-static brush | Eliminate remaining fine particles |
| 3 | Lens pen | Spot clean fingerprints or oils |
| 4 | Cloth/wipe + fluid | Deep clean and remove smudges |
| 5 | Dry microfiber | Final polish and inspection |
When (and When Not) to Clean Your Lens
When you should clean:
- You see smudges, water spots, or fingerprints
- Dust or haze is affecting images
- Before or after exposure to dirty/wet environments
When not to clean:
- If the lens is only mildly dusty, unnecessary cleaning may introduce risk
- If you see internal dust spots (those require sensor or internal cleaning)
- If lens surfaces are compromised (e.g. cracked)
In forums, many experienced users remind others: “Don’t clean your lenses unnecessarily … over-cleaning is what causes damage.”
Quick Decision Chart: Should You Clean or Not?
| Situation | Clean Now | Wait / Don’t Clean |
|---|---|---|
| Fingerprints, smudges, or oily spots | Yes | No |
| Visible dust in images | Yes | No |
| Light external dust not visible in shots | No | Wait |
| Dust inside the lens elements | No | Wait |
| After shooting in rain, saltwater, or beach | Yes | No |
| In a windy or dusty outdoor area | No | Wait |
| Before long-term storage | Yes | No |
Maintenance Tips & Storage for Camers Lens Cleaners
- Keep cleaning tools separate and sealed
- Use dust caps and lens hoods routinely
- Store microfiber cloths in clean pouches
- Replace worn tools (cloths, pen tips)
- Avoid airborne dust in storage areas
- For long-term storage, ensure lenses are dry and clean before sealing
Quick Checklist for Lens Maintenance:
| Task | Frequency | Tools Needed |
|---|---|---|
| Blow off dust | After every shoot | Air blower |
| Wipe lens elements | As needed | Microfiber cloth or lens wipes |
| Check for fungus or mold | Monthly | Flashlight inspection |
| Clean filters and caps | Monthly | Lens wipes |
| Professional servicing | Every 12–18 months | Service technician |
| Refresh silica gel | Every 2–3 months | Desiccant packs |
Comparing Types & When to Use Which
| Situation | Use | Why |
|---|---|---|
| Quick smudge outdoors | Pre-moistened wipe | Fast and portable |
| Air blower/brush | Microfiber cloth + spray | Gentle control |
| Spot cleaning fingerprints | LensPen / carbon tip | No excess moisture |
| Removing dust | Air blower / brush | No contact means safer |
| Deep cleaning before storage | Specialist cleaner + cloth | Remove tough residues |
| Travel | Compact wipe or Spudz-style tool | Leak-proof and small |
Common Mistakes to Avoid
- Skipping the blower and going straight to wiping (risking scratches)
- Overusing liquid cleaner
- Using household cleaners (ammonia, alcohol, window cleaners)
- Using a dirty cloth or a reused wipe
- Applying too much pressure
- Using tools with grit or stuck particles
- Cleaning in dusty or windy conditions
Conclusion
Keeping your camera lens clean and well-maintained is essential for preserving image quality and extending the life of your equipment. A spotless lens allows your camera to capture sharp, vibrant, and true-to-life photos without distortion or haze. But proper lens care isn’t just about frequent cleaning; it’s about cleaning correctly and only when necessary. Using the right camera lens cleaners, such as blowers, microfiber cloths, and safe cleaning solutions, ensures that delicate coatings remain unharmed. Just as important is proper storage, keeping your lenses dry, dust-free, and protected from temperature changes or humidity. Regular maintenance and mindful handling can prevent costly repairs and maintain peak optical performance. When you respect your gear, it rewards you with flawless clarity and consistency in every shot. Treat your lens with care, and it will continue to deliver professional results for years to come.
People May Ask
- How often should I clean my camera lens?
Only when necessary. Frequent unnecessary cleaning raises the risk of scratches or degrading coatings. Clean when you see smudges or dust affecting your images. - Is it safe to use household glass cleaner on my lens?
No — most household cleaners contain chemicals (ammonia, alcohol, surfactants) that can strip lens coatings or damage sealing. - Can I just use a microfiber cloth dry?
Sometimes for light dust or smudges, yes. But for oils or fingerprints, a small amount of optical-grade cleaner is much more effective and safer. - What should I do if there is fungus or internal haze?
That’s a specialist repair job. Avoid trying to clean inside lens elements yourself — send it to a service or manufacturer. - How do I know when a cleaning tool (cloth, pen) is too worn?
If the cloth no longer feels smooth or starts leaving fibres, or the pen tip loses cleaning power or becomes abrasive, it’s time to replace it.